A patient registration and image upload application where patient records can be made and images can be uploaded. Patients can be updated, their pictures can be deleted and listed. With the project, I experienced uploading images to the database with PHP.
💻 Tech Stack
PHP
Bootstrap
Javascript
🎨 Features
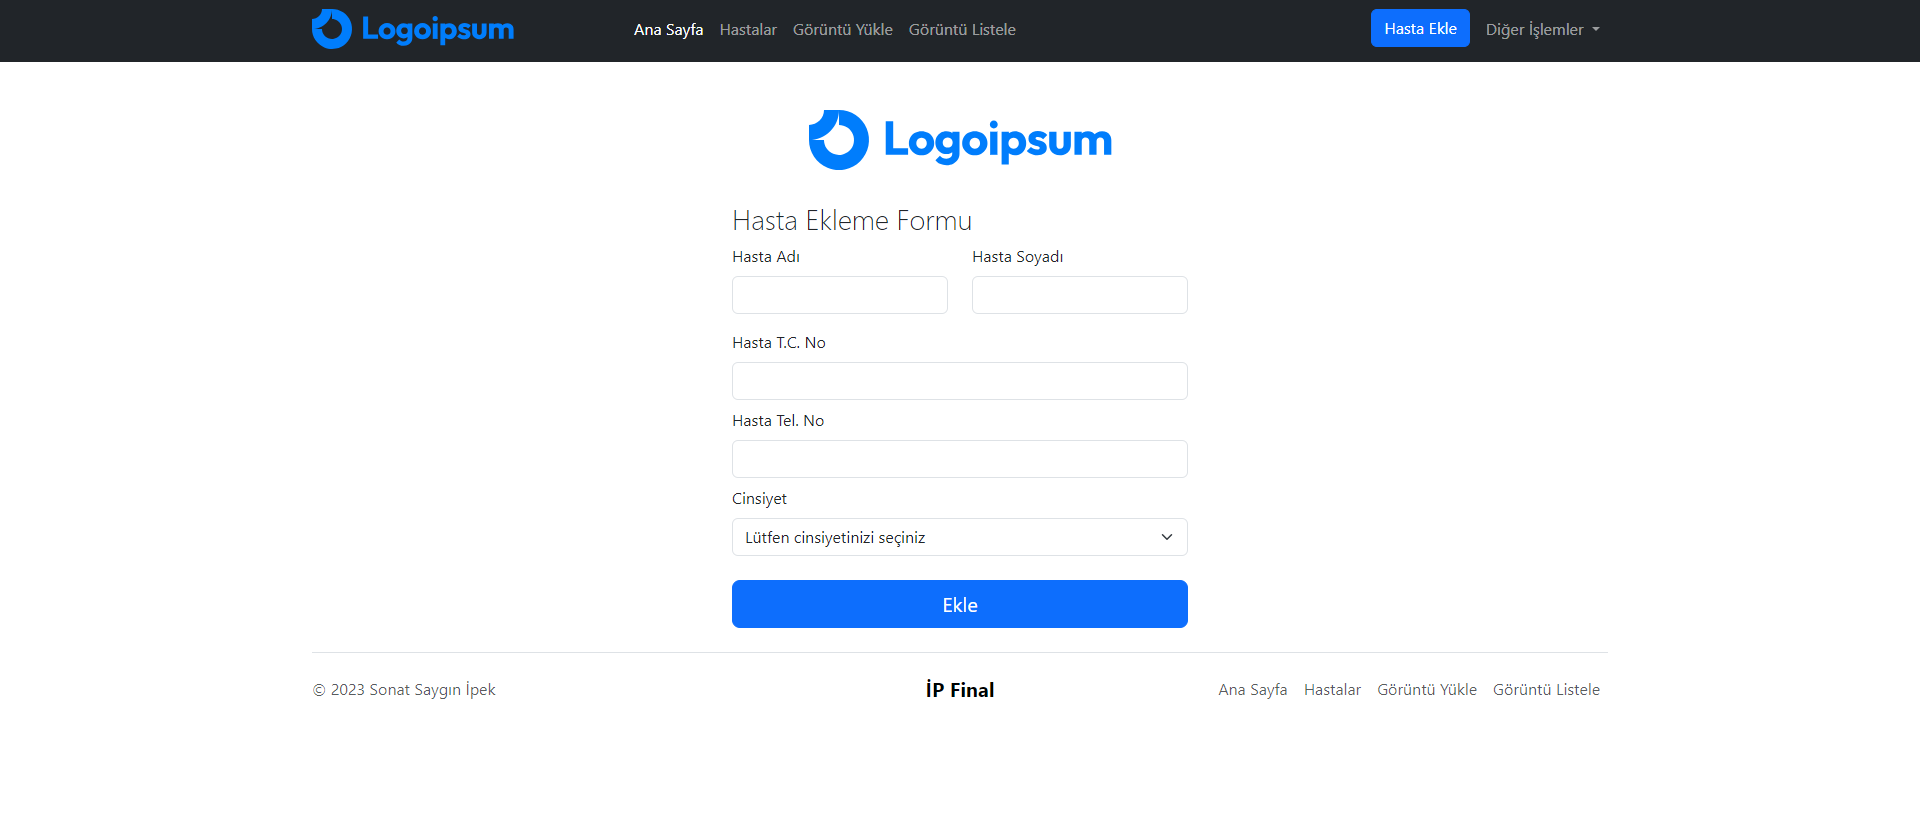
Patient Addition, Deletion, Update and Listing Operations
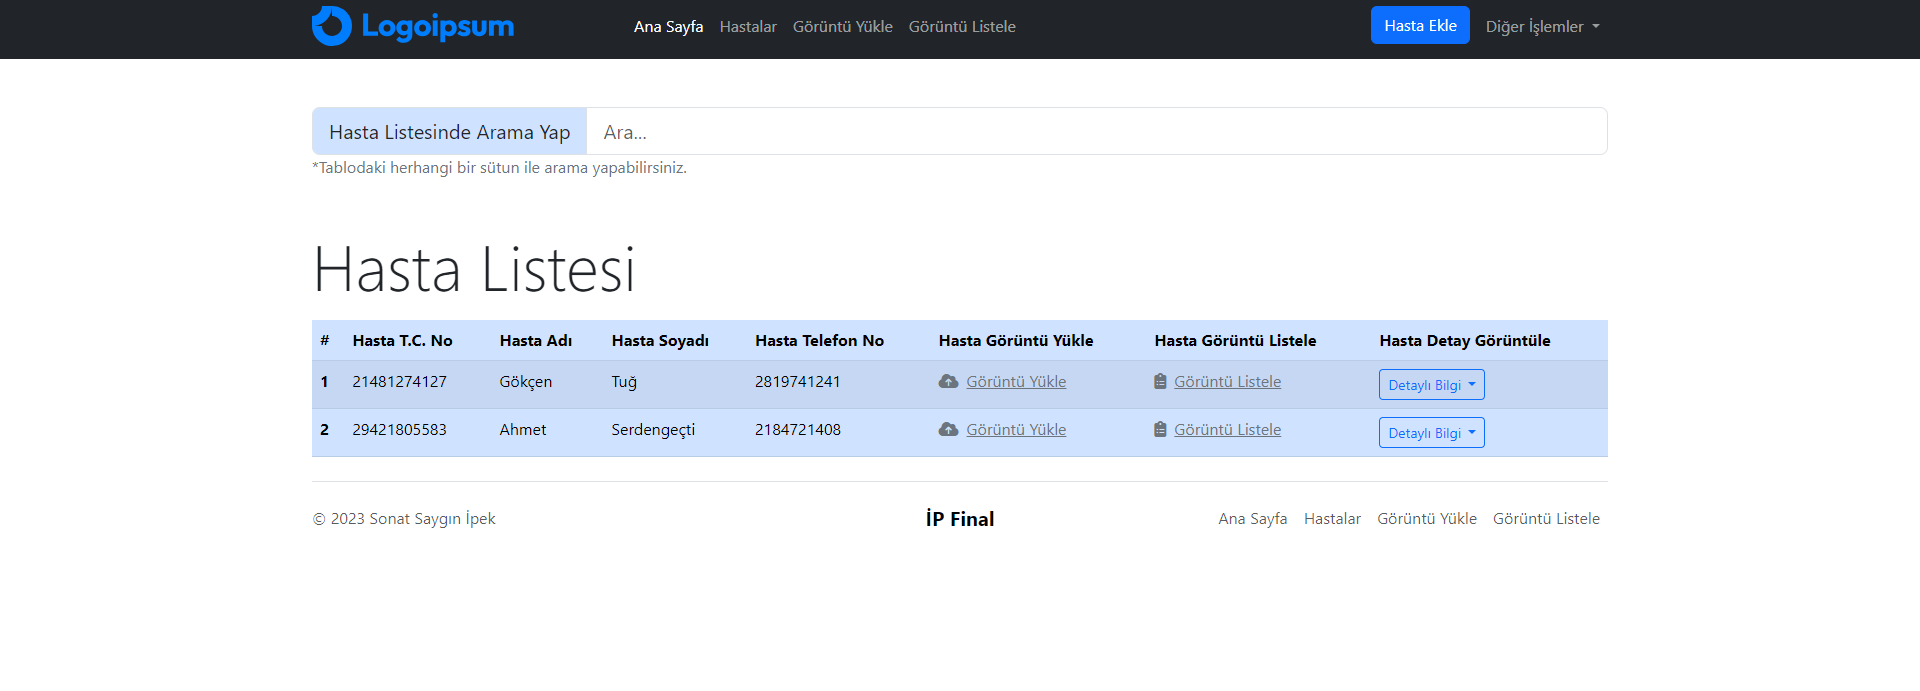
Patient Search
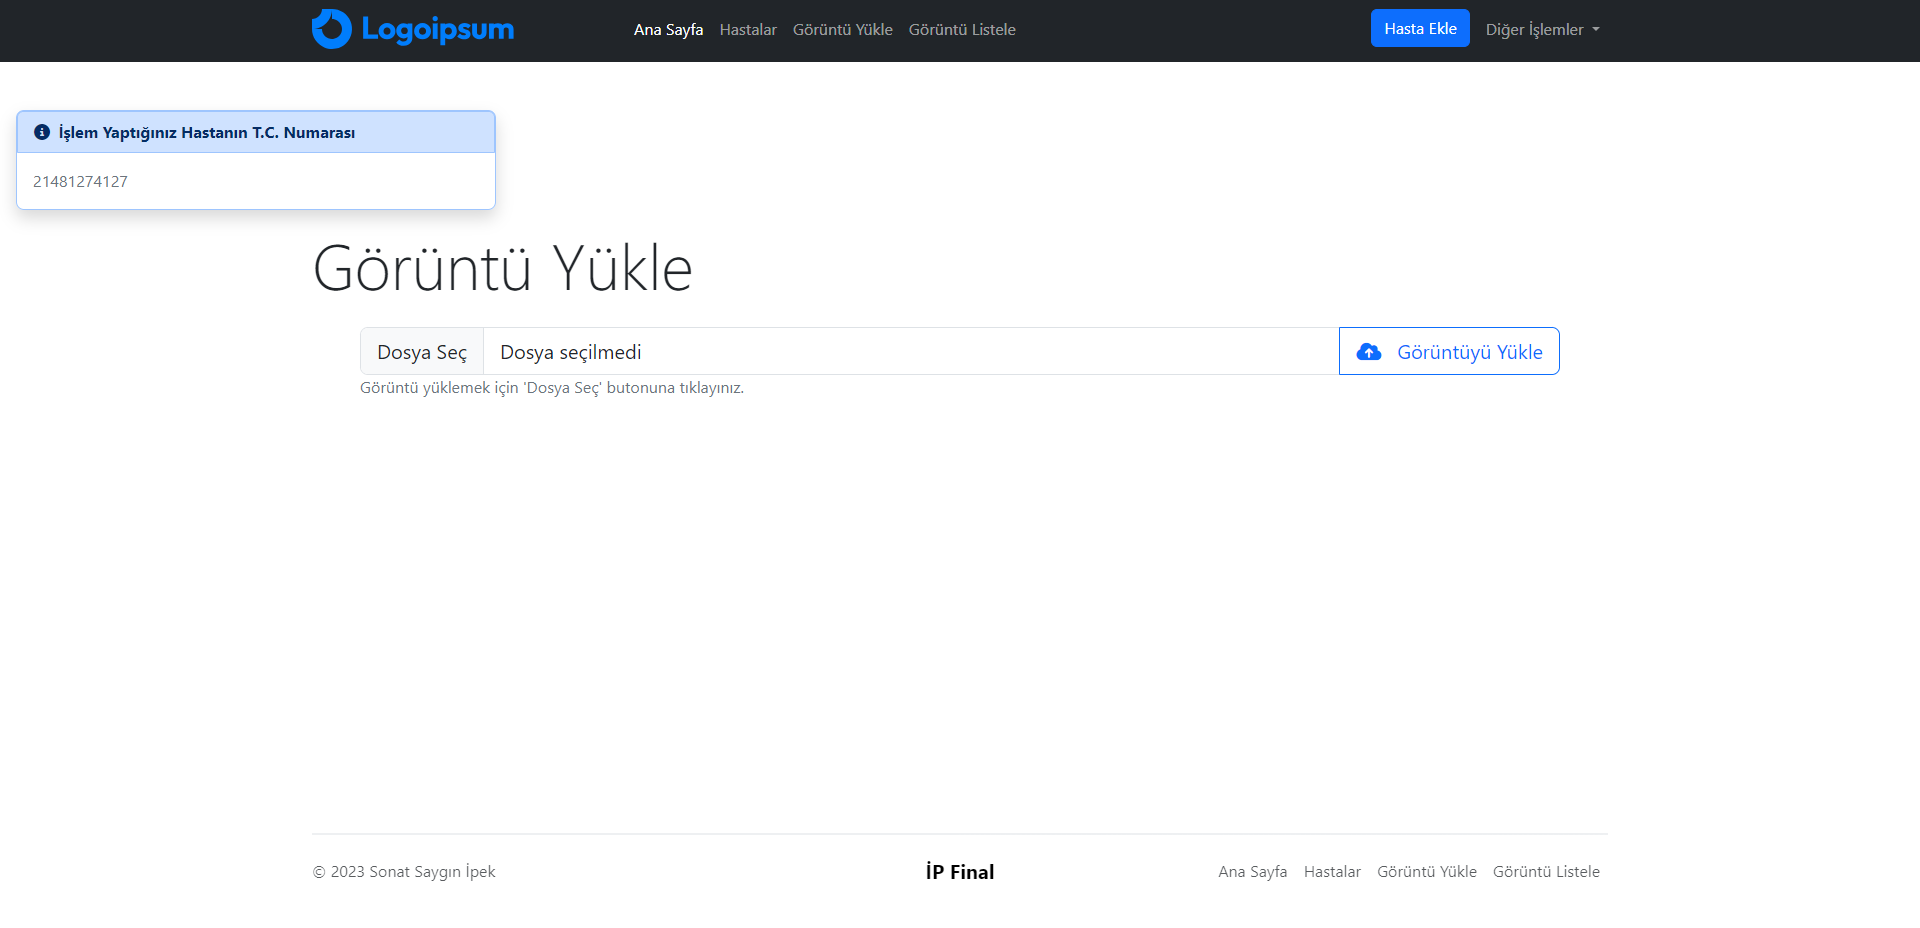
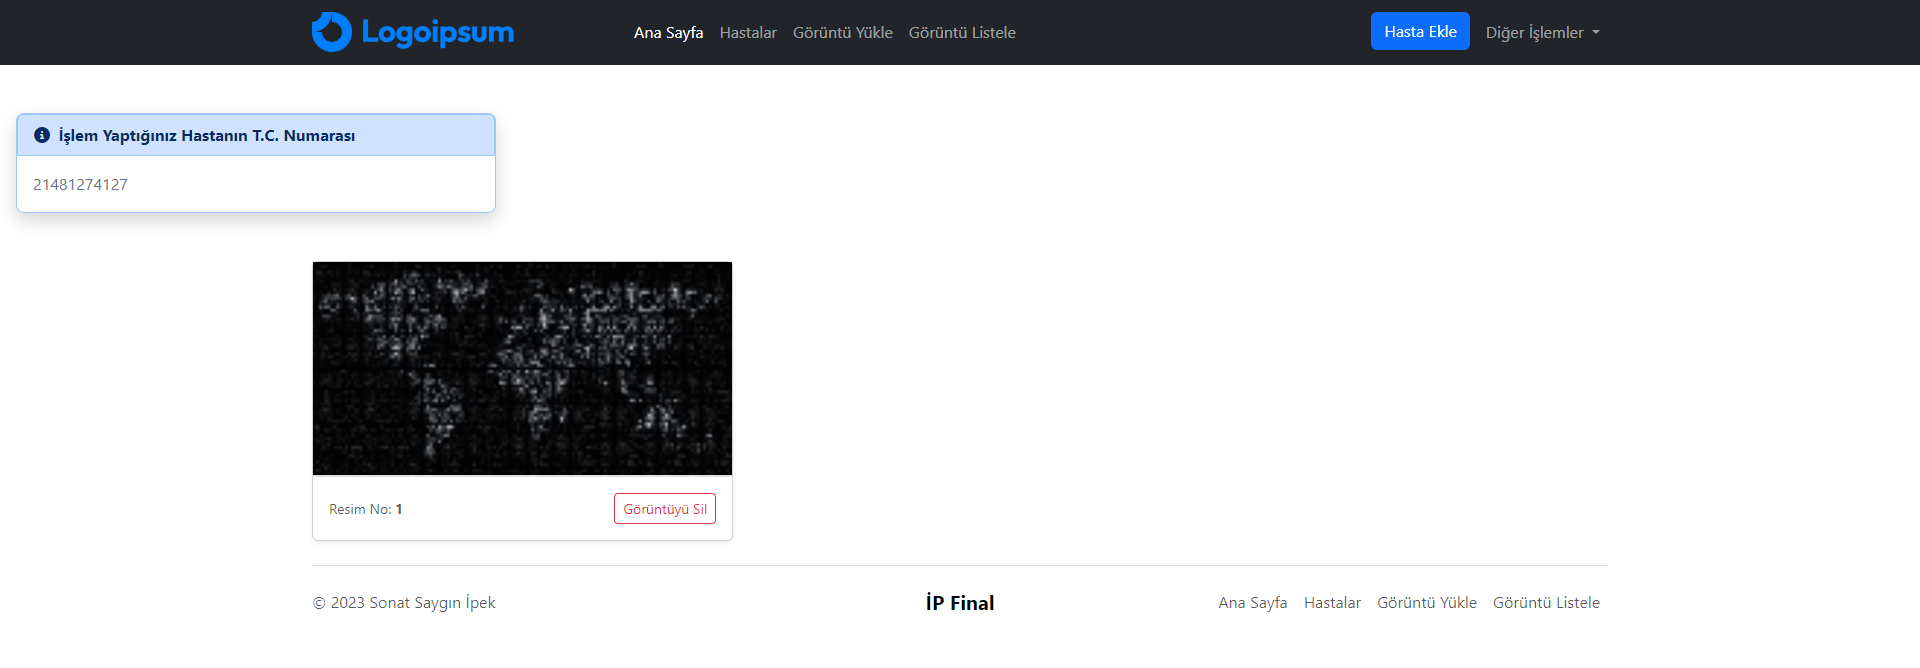
Uploading, Deleting and Listing Patient Images
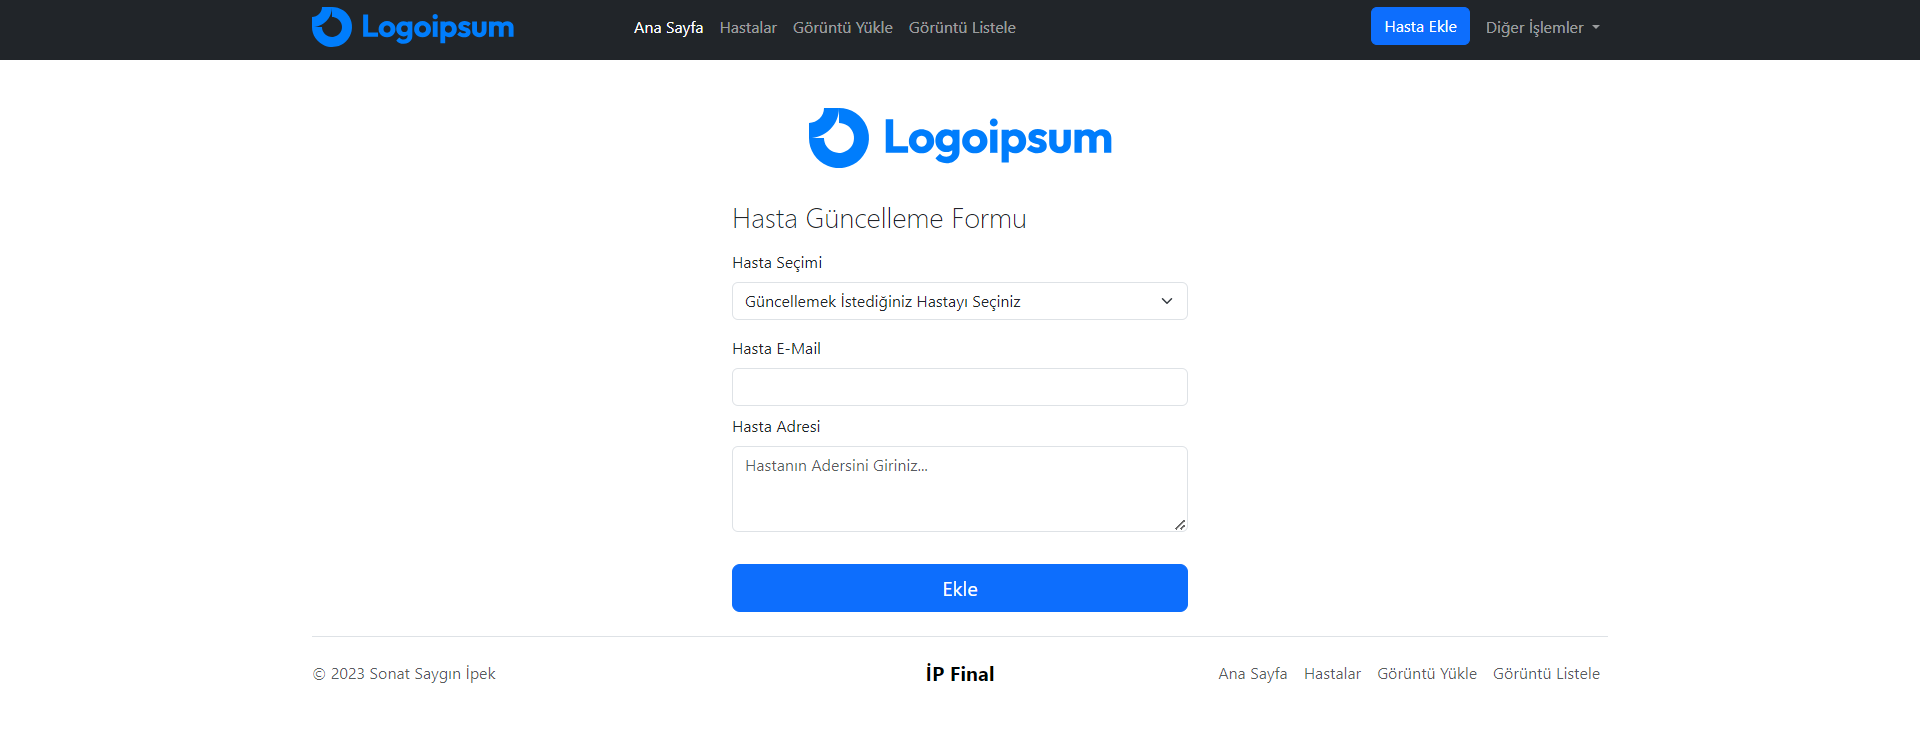
📷 Screen Shots
Environment Variables
To run this project you will need to add the following environment variables to your file
db/config.php > DB_USER
db/config.php > DB_PASS
🚀 Run on Your Computer
Note: You must have PHP and MySQL installed on your computer.
Note2: You must have an apache server such as XAMPP installed on your computer and you must open Apache Server and MySQL services before the operations.
3. Run the required database script and add the environment variables
hospital-system/database.sql
4. Add the project into your apache server folder. For XAMPP;
xampp/htdocs/hospital-system
5. Run it on your localhost. Try typing this in your browser bar;
localhost/hospital-system
6. That’s all!
🌟 Feedback
You can support me with your feedback. If you have any feedback, please contact at sonatsayginipek@gmail.com or sonatipek.com .
📊 Hastane Sistem Uygulaması – TR
Hasta kayıtlarının yapıldığı, resimlerinin yüklenilebildiği bir hasta kayıt ve resim yükleme uygulaması. Hastalar güncellenebilir, resimleri silinebilir, listelenebilir. Proje ile PHP ile veritabanına resim yüklemeyi tecrübe ettim.
💻 Kullanılan Teknolojiler
PHP
Bootstrap
Javascript
🎨 Özellikler
Hasta Ekleme, Silme, Güncelleme ve Listeleme İşlemleri
Hasta Arama
Hastanın Görüntülerini Yükleme, Silme ve Listeleme İşlemleri
📷 Ekran Görüntüleri
Ortam Değişkenleri
Bu projeyi çalıştırmak için aşağıdaki ortam değişkenlerini dosyanıza eklemeniz gerekecek
db/config.php > DB_USER
db/config.php > DB_PASS
🚀 Bilgisayarınızda Çalıştırın
Not: Bilgisayarınızda PHP ve MySQL kurulu olmalıdır.
Not2: Bilgisayarınızda XAMPP gibi bir apache server kurulu olmalıdır ve işlemlerden önce Apache Server ve MySQL servislerini açmalısınız.
5. Localhost’unuzda çalıştırın. Tarayıcı çubuğunuza bunu yazmayı deneyin;
“bash
localhost/hastane-sistemi
## 🌟 Geri bildirim
Beni geri bildirimlerinizle destekleyebilirsiniz. Herhangi bir geri bildiriminiz varsa, lütfen **sonatsayginipek@gmail.com** veya **sonatipek.com** adresinden iletişime geçin.
Clone the repository to your local machine. git clone https://github.com/rajter/Picket.git
Change directory to Picket cd Picket
Create directory “build” mkdir build
Change directory to build cd build
Execute cmake for Release build cmake -DCMAKE_BUILD_TYPE=Release ..
Execute sudo make install to build and install it on your machine.
  git clone https://github.com/rajter/Picket.git
  cd Picket
  mkdir build
  cd build
  cmake -DCMAKE_BUILD_TYPE=Release ..
  sudo make install
The goal of Accownt is to be a full-featured, standalone account system that’s straightforward for developers and users, easy to maintain, and as customizable as possible without introducing too much complexity.
Features
Email + password login
Passwordless login via links sent to emails also available
Passwords are hashed with bcrypt
Two-Factor Authentication (2FA)
Authy, Google Authenticator, etc supported
Email verification
Plug in your SMTP credentials for Mailgun, Gmail, or anything else
Account recovery
Account deletion
No dependencies other than Node and what npm will install
No database needed
Standalone server and web client
Easy integration into new and existing applications of any stack
reCAPTCHA v2 support
JSON Web Tokens (JWT)
Shared JWT and cookie between Accownt and your app for session authentication
As simple as Accownt is, you’ll still need to install, configure, build, and integrate into your app. We’ve made it just about as easy as it could possibly be.
Note #1: If your system does not yet have Node installed, start with nvm (or nvm for Windows).
Note #2: You may alternatively download Accownt through npm (see here), however this is not currently the recommended installation method. In the future we’ll likely have a CLI tool available through npm to make configuring, running, and managing Accownt instances easier.
Step 0: Clone the repo
git clone https://github.com/xyfir/accownt.git
cd accownt
From now on we’ll assume commands are run from accownt/.
Step 1: Download npm dependencies
Install npm depencies for each module:
cd server
npm install
cd ../web
npm install
cd ../ # back to accownt/
Step 2: Set environment variables
The Accownt modules are configured via environment variables which are loaded into the applications via .env files located in each module’s directory.
To understand the syntax of the .env files, know that they are first loaded via dotenv and then the string values provided by dotenv are parsed by enve.
Step 2a: Create .env files
First we’ll create each file by copying the example .env files and then we’ll work our way through populating them with values.
Edit the files server/.env and web/.env. Update the config keys with your own values. You can find descriptions for each one under the Accownt -> Env namespaces in the type definitions. Use the appropriate interface for each corresponding file.
Step 3: Build from source
cd server
npm run build
cd ../web
npm run build
cd ../
Step 4: Start the server
Now you’ll need to start the server and serve the built files. The simplest way to do this is:
cd server
npm run start
cd ../
If you’re in production, you’ll probably run the server with pm2 and proxy the server through Nginx or Apache while serving static files through them instead of Node. For you, know that files to be served to the client are located in web/dist with web/dist/index.html serving as the web client’s entry file.
Step 5: Add Accownt to your app
This part is largely up to you, so it’s important to understand the flow of data between your app and Accownt:
Your app sends users to Accownt’s login/registration form either by user action or automatically through a forced redirection. All you need to do is get the user to Accownt, everything it needs to know is already in its config.
Accownt will handle everything until there’s a login, at which point it will redirect the user back to your app with the JWT in the URL based on your configuration. The same JWT will also be set as a cookie, so depending on your setup you may be able to and prefer to access this instead.
To be a bit more specific:
Somewhere in your app you’ll put login and/or registration links that point to the Accownt web client.
If your app utilizes the JWT cookie that Accownt sets then all you need to do is verify the token with each request via jsonwebttoken or the equivalent in your preferred language.
Once the JWT is verified and decoded, you can retrieve the userId and email properties from it to use however you need. Note that userId is a unix timestamp in milliseconds (13 digits!) that corresponds to when the user created their account. Also keep in mind that if your app is receiving a JWT, the user’s email has already been verified.
If the JWT is invalid or expired, redirect them back to the Accownt form or to unauthenticated parts of your app.
Lastly, you’ll need a route somewhere to catch redirections and tokens from Accownt after each successful login. You set this already in your
There are also some optional steps you can take to improve the user experience:
You can also add a link somewhere that takes authenticated users to Accownt so they can modify their account information, like their password or 2FA.
You can allow users to delete their accounts by configuring the proper environment variables.
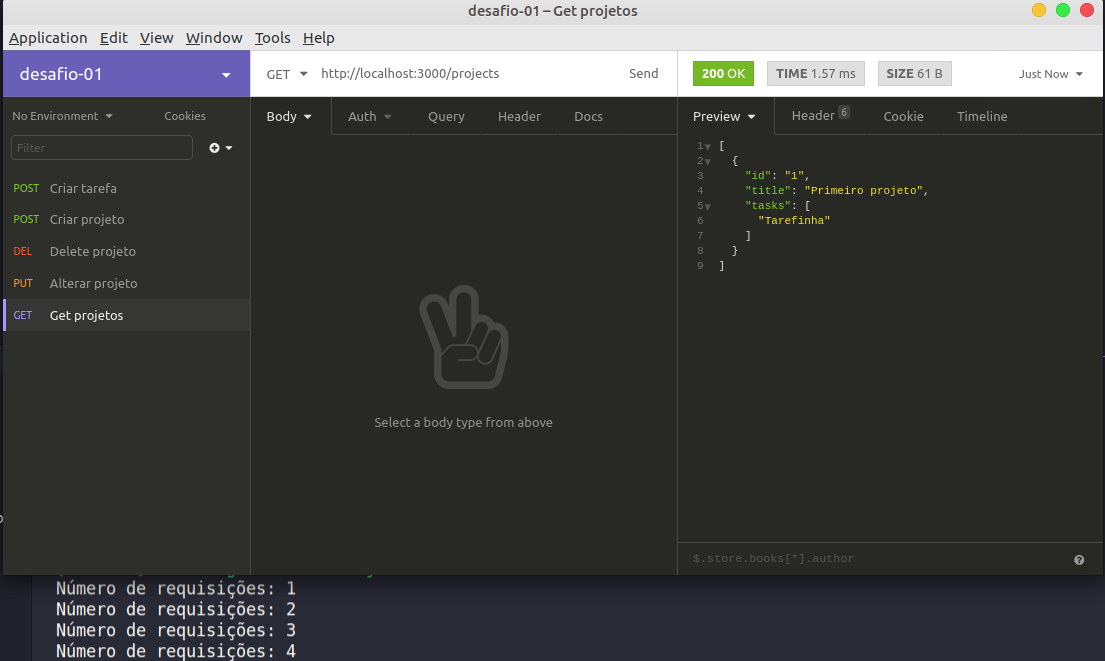
Essa aplicação será utilizada para armazenar projetos e suas tarefas.
Rotas
POST /projects: A rota deve receber id e title dentro corpo de cadastrar um novo projeto dentro de um array no seguinte formato: { id: "1", title: 'Novo projeto', tasks: [] };
GET /projects: Rota que lista todos projetos e suas tarefas;
PUT /projects/:id: A rota deve alterar apenas o título do projeto com o id presente nos parâmetros da rota;
DELETE /projects/:id: A rota deve deletar o projeto com o id presente nos parâmetros da rota;
POST /projects/:id/tasks: A rota deve receber um campo title e armazenar uma nova tarefa no array de tarefas de um projeto específico escolhido através do id presente nos parâmetros da rota;
Exemplo
Se eu chamar a rota POST /projects repassando { id: 1, title: 'Novo projeto' } e a rota POST /projects/1/tasks com { title: 'Nova tarefa' }, meu array de projetos deve ficar assim:
Crie um middleware que será utilizado em todas rotas que recebem o ID do projeto nos parâmetros da URL que verifica se o projeto com aquele ID existe. Se não existir retorne um erro, caso contrário permita a requisição continuar normalmente;
Crie um middleware global chamado em todas requisições que imprime (console.log) uma contagem de quantas requisições foram feitas na aplicação até então;
We believe in a future in which the web is a preferred environment for numerical computation. To help realize this future, we’ve built stdlib. stdlib is a standard library, with an emphasis on numerical and scientific computation, written in JavaScript (and C) for execution in browsers and in Node.js.
The library is fully decomposable, being architected in such a way that you can swap out and mix and match APIs and functionality to cater to your exact preferences and use cases.
When you use stdlib, you can be absolutely certain that you are using the most thorough, rigorous, well-written, studied, documented, tested, measured, and high-quality code out there.
To join us in bringing numerical computing to the web, get started by checking us out on GitHub, and please consider financially supporting stdlib. We greatly appreciate your continued support!
The branches.md file summarizes the available branches and displays a diagram illustrating their relationships.
To view installation and usage instructions specific to each branch build, be sure to explicitly navigate to the respective README files on each branch, as linked to above.
This package is part of stdlib, a standard library for JavaScript and Node.js, with an emphasis on numerical and scientific computing. The library provides a collection of robust, high performance libraries for mathematics, statistics, streams, utilities, and more.
For more information on the project, filing bug reports and feature requests, and guidance on how to develop stdlib, see the main project repository.
Adds a new sidebar to the block editor for post types that support wporg-internal-notes. Editors can leave notes about the current post that other editors can read, but the notes are not visible on the front end.
Configuration
To enable internal notes for a particular post type, add this line to an mu-plugin or somewhere in the plugin that registers the post type:
add_post_type_support( '[post type slug here]', 'wporg-internal-notes' );
To enable log entries for changes to posts, which will appear in the same stream with internal notes, add this line:
add_post_type_support( '[post type slug here]', 'wporg-log-notes' );
You can also specify only certain change events to log. See logging_enabled() for a list of available events.
È stato pensato per monitorare i dati ambientali attraverso una raspberry ed introdurre l’entropia sufficiente nel programma.
Quello che viene eseguito è un ciclo infinito per incrementare una variabile in un range fissato e leggere lo stato della variabile
quando si verificano le condizioni ambientali stocastiche come piccole variazioni della pressione atmosferica.
Viene cosi prodotta una sequenza casuale, dimostrabile attraverso l’istogramma delle frequenze si osservano solo distribuzioni uniformi sulle chiavi generate.
One-Time-Pad
È il tentativo di implementare un cifrario a flusso di tipo OTP attraverso il fix delle falle crittografiche del noto RC4, cercando di far coesistere la sicurezza dei cifrari OTP alla praticità dei cifrari più moderni come AES.
Un cifrario OTP è un cifrario perfetto perchè è matematicamente sicuro.
L’idea di base è quella di usare il cifrario Vigenere, insicuro di per sè, ed imporre particolari condizioni sulle chiavi per creare un nuovo cifrario, di tipo OTP, chiamato Vernam.
Le condizioni sono:
chiave crittografica lunga quanto il testo in chiaro
casualità della chiave
ad ogni testo in chiaro da cifrare deve corrispondere una chiave diversa (One Time Pad)
Il cifrario cosi definito resiste anche al bruteforce delle chiavi con potenza di calcolo infinita, perchè implementa il concetto di crittografia negabile, in quanto nel processo di crittoanalisi si estrarrebbero tutti i possibili testi di senso compiuto e non si potrebbe dire quale messaggio sia stato veramente scambiato.
sincVernam.py
In sincVernam.py non si usa la matrice di Vigenere per la codifica ma l’operatore XOR per estendere l’alfabeto a tutti i char.
Essendo il cifrario Vernam di difficile implementazione per l’onerosa gestione delle chiavi, si cerca di adottare dei compromessi.
Il processo di crittografia è il seguente:
richiesta di una password
generazione dell’hash crittografico della password da usare come seed
inizializzazione di un generatore di numeri peseudocasuali crittograficamente sicuro usando l’hash precedente come seed
generare una sequenza di numeri pseudocasuali ma crittograficamente sicura da usare come chiave crittografica
eseguire lo XOR tra testo in chiaro e chiave crittografica
incrementare un contatore da appendere alla password iniziale per generare chiavi crittografiche sempre diverse
iterare i passaggi precedenti su messaggi in chiaro nuovi
Vengono quindi soddisfatte tutte le condizioni del cifrario Vernam:
la prima implementando un generatore che garantisce la lunghezza della chiave con il minimo sforzo
la casualità non c’è per consentire di ricavare le chiavi crittografiche a partire da una password, ci si avvicina alla sicurezza OTP per l’uso di un generatore pseudocasuale crittograficamente sicuro
per ogni nuovo messaggio in chiaro viene derivata una nuova chiave crittografica impossibile da ricavare senza conoscere la password iniziale
Inoltre viene calcolato un hash di integrità del messaggio ed appeso al testo cifrato.
Si potrebbe anche appendere alla fine del testo cifrato il contatore per garantire la sincronia e poter correggere errori di sincronizzazione nel caso in cui qualche messaggio venga perso. Il valore di questo contatore può essere pubblico svolgendo il ruolo logico di salt crittografico per la derivazione di nuove password.
Viene anche impostato un tempo di delay casuale di elaborazione dentro alle varie funzioni per mitigare attacchi di timing ed è aggiunto al messaggio in chiaro un timestamp con data e ora della cifratura per mitigare gli attacchi di replica.
Crittoanalisi
L’unica crittoanalisi nota è sulla password, punto in cui il cifrario è più vulnerabile ad attacchi di bruteforce per esempio, ritenuti mitigabili però attraverso la forza della password scelta come per altri cifrari ritenuti sicuri come AES. Si consiglia di usare il cifrario all’interno di adeguati standard e protocolli sulla gestione delle password.
La crittografia negabile si ottiene trasformando il cifrario a flusso in un cifrario a blocchi che contengano un numero di char in chiaro uguali a quelli del digest dell’algoritmo di hashing crittografico usato, come per esempio sha512, e la derivazione di nuovi hash per ogni blocco di testo in chiaro.
OTP.py
Il programma riprende la versione fixata di sincVernam.py ed aggiunge la possibilità di usare, oltre ad una password, un file di dati casuali come chiave crittografica, bypassando a derivazione delle chiavi generate con un generatore pseudocasuale.
La generazione di chiavi pseudocasuali subentra nel momento in cui viene esaurito il file usato come chiave crittografica, perchè ad ogni byte di messaggio cifrato o decifrato corrisponde una riduzione di un byte del file chiave tramite il suo troncamento, evitandone il reimpiego e garantendo la sicurezza OTP.
L’uso sicuro richiede lo sviluppo di un protocollo ed un framework all’interno del quale avviene la gestione delle chiavi casuali e della sincronizzazione delle comunicazioni.
This library contains some small utilities that I would use occasionaly but don’t really fit a certain category. Some of my other libraries also use these types so they basically have been moved to a package for them to share and use.
Just add a reference the the package and add the appropriate using statement using Narumikazuchi.
dotnet add package Narumikazuchi
Types & Usage
Types
AlphanumericVersion
This struct provides all the same functionality that is also provides by the System.Version class but additionally provides the ability to use alphabetic characters as well as a -(dash) character in the version descriptor. With this, version descriptors like 1.0-alpha1 or rc3-1.0.0 are possible.
AttributeResolver
The AttributeResolver static class is a simple wrapper around the System.Reflection methods that are used to get specific Attribute classes from assemblies, types, methods, properties, fields or parameters, that are decorated with them. The results of the member methods will get cached and improve performance for the next time the method is called with the same parameter.
HasAttribute<TAttribute> will check whether or not the object reflected by the passed parameter is decorated with an attribute of type TAttribute and will return true if at least one attribute of that type is found and otherwise false.
FetchFetchAllAttributes<TAttribute> will collect all instances of the attributes of type TAttribute the object reflected by the passed parameter is decorated with and return them as an ImmutableArray<TAttribute> to the caller.
FetchFetchSingleAttribute<TAttribute> might fail with an NotAllowed exception if the object reflected by the passed parameter is not decorated with an attribute of type TAttribute or if [AttributeUsage(..., AllowMultiple = true)]class TAttribute {...}. Otherwise this method will return the only instance of TAttribute the parameter is decorated with.
This delegate got added since there is a System.Comparison<T> delegate to compare for ordering for types that do not implement the System.IComparable<T> interface but no delegate as equivalent for types that do not implement the System.IEquatable<T> interface.
This might get deprecated once .NET 9 is out with the increases utility for extension methods, since the last time I checked you could just ‘extend’ a type to implement an interface that the original type currently does not, which would make this delegate basically useless. You can look here if you don’t know what I’m talking about.
EventHandler<TSender> and EventHandler<TSender, TEventArgs>
I added these delegates since the integrated System.EventHandler and System.EventHandler<T> delegates use the System.Object type for the sender in the method signature. With these 2 new delegates the will be no need to seperately cast the sender parameter on the delegate.
FailedInitialization
Sometimes you decide to use a struct instead of a class not because of the ‘value-type’ nature of what you want to implement, but rather the performance that it can bring, especially when the resulting struct in unmanaged. However that might also mean that the struct might be in an invalid state, due to being created with the default expression. This was the motivation behind this exception. However due to how it is named it can also be used in other scenarios and can provide literal feedback just through it’s name alone that something during initialization of something failed.
ImpossibleState
This one is mainly an exception for code readability. It might not happen often, but there are times when you just need to satisfy the compiler by throwing an exception while knowing fully well, that this exception will never get hit.
INotifyPropertyChangedHelper and INotifyPropertyChangingHelper
The origin of these interfaces was when I started implementing extension methods for collections. Because there were observable collections among them I needed a way to trigger the PropertyChanged and PropertyChanging events from outside of the class or struct. Right now I think this is bad design and am contemplating whether to deprecate these interfaces or not, but for now the are still here I guess.
NotAllowed
My motivation for this exception is simple readability. Sometimes it is just easier when the first word you are reading already tells you what the problem was. I’m also aware that readability is subjective. I personally don’t like the suffix ‘Exception’ because there is no other class or struct you can use in a throw statement and with the correct naming you can easily understand what problem occured. The name might also not be quite ideal for now, so it might change in the future. I’m alway open for suggestions on that part.
Pointer<TAny>
In rare cases one might need a pointer in C#, but who likes enabling unsafe context just for a few lines for the whole assemply? This struct provides a managed way to use pointers. It implicitly casts from and to System.IntPtr, System.UIntPtr and an unsafe pointer type. It provides the ability to go through an array-like structure, meaning you can perform pointer-arithmetic on it. This is obviously still highly unsafe if used uncorrectly, so use with care.
The AddressOf method serves as the primary way to construct a Pointer<TAny> struct. Use this to get the pointer to any object you need the pointer of.
staticpublicPointer<TAny>AddressOf(refTAnyt);
If for some reason you only have regular pointers, you can transform them into a Pointer<TAny> with on of these constructors.
Using the indexer will offset the pointer. The offset will be index * the width of the pointer. This basically only useful for scanning arrays.
publicTAnythis[Int32index];
Incase you need the address of the pointer you can get it with the Address property. But then again, you can also just implicitly cast it, if you want to.
publicSystem.UIntPtrAddress{get;}
Through this property you can get or set the value of the object at the pointers address. Be careful not to set any data where it doesn’t belong.
publicTAnyValue{get;set;}
Extensions
IComparable<TComparable>
Instead of only having Math.Clamp for primitive numeric types you can now use the SystemExtension.Clamp<TComparable> method on every class or struct that implements the System.IComparable<T> interface.
There are also 3 methods to check for boundaries and throw an ArgumentOutOfRangeException should the object not be within the specified bounds. Be aware that all of these methods expect neither the source nor boundary, lowerBoundary or higherBoundary to be null.
If you have a string and want to use it as a filename while either expecting or not knowing if it contains invalid characters to be used as filename, then you can use SystemExtension.SanitizeForFilename. This will just omit any invalid characters from the resulting string, so that it can be used as filename.
This will either get superceded by the planned FilePath type or it will get expanded upon with another overload to specify a character to replace an invalid one.
You can also use an extension method to check whether the System.String is null or whitespace. There are plans to improve the workings for this method but for now it can either throw an ArgumentNullException or a NullReferenceException depending on whether the asArgumentException parameter is set or not.
The Converter<TResult> static class was originally planned to an easy one-liner for conversion of a type that implements the IConvertible<TType> interface. There is now a ‘Narumikazuchi.Generators.Convertibles’ source generator in the works which will supercede the Converter<TResult> class and IConvertible<TType> interface.
ExceptionInformation and FunctionCallInformation
These types were originally supposed to help with logging and analyzing failures in an application. However I never found myself actually using them or even thinking of their usefulness. Thus I have made the decision, that the current functionality of exceptions is enough to analyze any failures in logging.
Extensions (Deprecated)
Exception
There was just an extension method ExtractInformation(this Exception source), whose job was to access the ExceptionInformation which was supposed to make exception more logging-friendly and readable. Since that type is now deprecated the method is also no longer needed.
For Contributors
Group files into folders with either similar meaning or covering topics of a similar namespace (i.e. Reflection)
DO NOT add sub-namespaces even for files in folders. The entire project used one namespace unless explicitly stated otherwise
Only one type per file
Filenames should equal the typename. If the type is generic use the following naming scheme Typename`NumberOfTypeParameters.cs
Keep files to less than 300 lines of code
Only 1 method call per line. If you chain method calls, align them at the dot (.) of the previous method call
Split compilation units into multiple files if the type for that CU implements interfaces. Create a file for each implemented interface with the naming scheme of Typename.Interface`NumberOfTypeParameters.cs, if the type is non-generic the backtick (`) and the number of type parameters should be omitted
Should the number of lines for private members and their implementations exceed 25 lines create a file with the naming scheme Typename.Private.cs and move private members into there
Should the type contain nested types create a seperate file for the nested type with the naming scheme Typename.NestedTypename.cs
Use #pragma to supress undesired warnings
DO NOT add using System.* to a file. Add usings from the System namespace and it’s sub-namespaces into the .csproj file under <ItemGroup><Using Include="System.*" /></ItemGroup> at the bottom of the file
Provide tests for every implemented type. Use sentence-like naming to express what is expected to happen given specific circumstances (i.e. class A_foo.should_return_42.if_instantiated_using_bar())
Tests should be implemented in the Tests project. Group the tests for your types according to where or for what it is expected to be used
Provide benchmarks for every implemented type. If applicable provide comparisons to native functionality.
Benchmarks should be implemented in the Benchmarks project. Group the benchmarks for your types in the same way they are grouped in the main project
Benchmarks
The Benchmarks project should be set as the default startup project in visual studio. Since there is no Debug configuration for the project you can just start the project directly from the IDE.
Alternatively you can run the benchmarks using the CLI:
dotnet run --project **YOUR_SOLUTION_LOCATION**/Benchmarks/Benchmarks.csproj
Roadmap
Latest Changelog 6.1.3
Added a StaticEventHandler<TEventArgs> delegate for static classes or just events where the sender is irrelevant
Added an overload for SanitizeForFilename(this String raw) where you can pass in the System.Char that replaces invalid characters instead of just omitting them
Added a FilePath type which checks and replaces invalid characters in a string directly
Added a ConstrainToImplementationAttribute which can mark a type parameter in an interface to force it’s implementation as type argument
Added an IInlineArray<TSelf, TElement> interface and a InlineArray<TElement> helper class for use with inline arrays (this is just the bare minimum, this will be expanded upon)


 https://github.com/sonatipek/hospital-system