Category: Blog

  • samloader-actions

    samloader-actions ⚙️


    samloader-actions is a GitHub CI script designed to download the required files for Magisk to root your Samsung device without downloading large firmware files.

    Note

    For Telegram uploads: Create a public Telegram channel and bot, add the bot as an admin, and set GitHub secrets TELEGRAM_BOT_TOKEN with your bot token and TELEGRAM_CHAT_ID with your channel ID.

    Prerequisites 📋

    Important Warnings ⚠️

    • Backup important data before proceeding as bootloader unlocking will factory reset your device

    Rooting Process

    🟢 Step 1: Unlock Bootloader

    Choose the appropriate guide for your device:

    🟢 Step 2: Download Required Files

    🟠 Method 1: Using Provided Details (Recommended)


    ⚠️ Important Warnings when using this method:

    • Update your device to the latest software before unlocking bootloader to avoid boot failures
    • Correct IMEI is crucial – wrong IMEI will cause the script to fail


    1. Fork this repository and give it a star ⭐️

    2. Navigate to the “Actions” tab and select “Download Using Provided Details”

    3. Fill in all required information and press “Run workflow” ✅

      Note: Find your CSC in “Settings > About phone > Software information > Service provider software version”

    4. Wait 10-15 minutes for the download to complete

    5. Download the output files from your Telegram channel or Workflow artifacts

    🟠 Method 2: Using a Direct Link

    • We don’t need to update the device to the latest software version since we can specify which firmware package to use with this method 🙂
    1. Fork this repository and give it a star ⭐️

    2. Navigate to “Actions” tab and select “Download using a Direct Link”

    3. Enter your model number and direct firmware link, then press “Run workflow” ✅

      To get a direct firmware link:

      • Visit samfw.com
      • Search for your model and region (CSC)
      • Find the exact firmware version matching your build/baseband number
      • Click “Download on Samfw Server”
      • Cancel the download and go to downloads page (CTRL + J)
      • Right-click on the canceled file and copy the link
    2.mp4
    1. Wait 5-10 minutes for processing to complete

    2. Download the output files from Telegram or artifacts

    🟢 Step 3: Patching and Flashing

    1. Download and extract the artifact zip file

    2. Extract the “YOUR-MODEL-Magisk-files.tar” from the zip

    3. Copy the extracted TAR file to your phone’s internal storage

    4. Download and install Magisk Manager

    5. Open Magisk Manager → Install → Select and Patch a File → Choose the TAR file → LET’S GO

    1.mp4
    1. Copy the patched file from your Download folder to your PC

    2. Reboot your device to Download mode

    3. Open ODIN, click the “AP” button and select “magisk_patched-xxxx.tar”

    4. Press “Start” to flash the patched file

    5. Wait for your device to boot

      • If boot fails, perform a “wipe data/factory reset” using Android recovery
    6. Open Magisk Manager and accept the prompt to reboot

    7. Verify root access with a root checker app

    🔴 Troubleshooting

    If you encounter issues, refer to the common issues and fixes guide.

    Credits

    Visit original content creator repository https://github.com/ravindu644/samloader-actions
  • lru-cache

    Visit original content creator repository
    https://github.com/allex/lru-cache

  • wx_gl_cube_tutorial

    Modern OpenGL App (Core Profile) with wxWidgets as the UI Framework for displaying a simple 3D cube.

    Video

    Full Tutorial: https://www.youtube.com/watch?v=-Vyq221eEmU

    How this works

    This app searches for the wxWidgets library using FindPackage. If not found, it downloads the library source from GitHub, compiles it, and links it with the main project.

    The super build pattern with ExternalProject_Add is used to achieve this.

    Requirements

    This works on Windows, Mac, and Linux. You’ll need cmake and a C++ compiler (tested on clang, gcc, and MSVC).

    Linux builds require the GTK3 library and headers installed in the system. You can install them on Ubuntu using:

    sudo apt install libgtk-3-dev

    OpenGL tutorials require OpenGL development package on Linux (Windows and Mac should work out of the box):

    sudo apt install libglu1-mesa-dev

    Building

    To build the project, use:

    cmake -S. -Bbuild
    cmake --build build

    This will create a directory named build and create all build artifacts there. The main executable can be found in the build/subprojects/Build/wx_gl_cube_tutorial_core folder.


    Check out the blog for more! www.onlyfastcode.com

    Visit original content creator repository https://github.com/lszl84/wx_gl_cube_tutorial
  • actions-package-update

    actions-package-update

    This tool keeps npm dependencies up-to-date by making pull requests from GitHub Actions or CI.

    actions-package-update

    This tool is the successor of taichi/ci-yarn-upgrade.

    Basic Usage

    GitHub Action for package.json update.

    GitHub Actions

    Below is the complete workflow example:

    name: Update
    
    on:
      schedule:
      - cron: 0 0 * * 3
      
    jobs:
      package-update:
        runs-on: ubuntu-latest
        steps:
        - uses: actions/checkout@master
        
        - name: set remote url
          run: git remote set-url --push origin https://$GITHUB_ACTOR:${{ secrets.GITHUB_TOKEN }}@github.com/$GITHUB_REPOSITORY
          
        - name: package-update
          uses: taichi/actions-package-update@master
          env:
            AUTHOR_EMAIL: john@example.com
            AUTHOR_NAME: john
            EXECUTE: "true"
            GITHUB_TOKEN: ${{ secrets.GITHUB_TOKEN }}
            LOG_LEVEL: debug
          with:
            args: -u --packageFile package.json --loglevel verbose

    Notes:

    • this workflow runs every Wednesday at midnight.
    • all args are passed to npm-check-updates.
    • AUTHOR_NAME and AUTHOR_EMAIL are use for the commit.
    • if you set EXECUTE as true, then actions-package-update makes a Pull Request.
    • you must grant access using the built-in GITHUB_TOKEN value as above, because actions-package-update access to your repository and make Pull Request.

    Examples

    • Update devDependencies only

      - name: package-update
        uses: taichi/actions-package-update@master
        env:
          AUTHOR_EMAIL: john@example.com
          AUTHOR_NAME: John
          EXECUTE: "true"
          GITHUB_TOKEN: ${{ secrets.GITHUB_TOKEN }}
        with:
          args: -u --packageFile package.json  --dep dev
    • Use yarn upgrade

      - name: package-update
        uses: taichi/actions-package-update@master
        env:
          AUTHOR_EMAIL: john@example.com
          AUTHOR_NAME: John
          EXECUTE: "true"
          GITHUB_TOKEN: ${{ secrets.GITHUB_TOKEN }}
          UPDATE_COMMAND: yarn
        with:
          args: upgrade --latest
    • Use npm update

      - name: package-update
        uses: taichi/actions-package-update@master
        env:
          AUTHOR_EMAIL: john@example.com
          AUTHOR_NAME: John
          EXECUTE: "true"
          GITHUB_TOKEN: ${{ secrets.GITHUB_TOKEN }}
          UPDATE_COMMAND: npm
        with:
          args: update
    • Use pnpm update

      - name: package-update
        uses: taichi/actions-package-update@master
        env:
          AUTHOR_EMAIL: john@example.com
          AUTHOR_NAME: John
          EXECUTE: "true"
          GITHUB_TOKEN: ${{ secrets.GITHUB_TOKEN }}
          UPDATE_COMMAND: pnpm
        with:
          args: update
    • Use ncu with yarn workspaces

      In your workspace root, run:

      yarn add -DW wsrun npm-check-updates

      Add this script to your root package.json:

      {
        "ncu-all": "ncu -u --packageFile package.json && wsrun --serial ncu -u --packageFile package.json"
      }

      Add this config:

      - name: package-update
        uses: taichi/actions-package-update@master
        env:
          AUTHOR_EMAIL: john@example.com
          AUTHOR_NAME: John
          EXECUTE: "true"
          GITHUB_TOKEN: ${{ secrets.GITHUB_TOKEN }}
          UPDATE_COMMAND: yarn
        with:
          args: ncu-all

    Local or CI Server|Service

    Install

    yarn global add actions-package-update
    

    or

    npm install actions-package-update -g
    

    or

    pnpm add --global actions-package-update
    

    Setting Environment Variables

    • Required Variables
      • GITHUB_TOKEN
      • AUTHOR_NAME and AUTHOR_EMAIL
        • this command use there variables for commit
      • EXECUTE
        • By default, actions-package-update runs in dry-run mode.
        • if you set to EXECUTE=true, then this command push branch to remote, and make a pull request.

    Command Behavior

    This command works locally and output result to standard output.

    CLI Output

    Optional Configurations

    • BRANCH_PREFIX
      • specify working branch prefix. default prefix is package-update/.
    • COMMIT_MESSAGE
      • specify the commit message. default message is update dependencies.
    • COMMIT_FILES
      • a space separated list of files that will be added to the commit. Leave empty to use git add --all.
        • for example, you can use "package.json package-lock.json" to ensure only these two files gets added to the commit
    • UPDATE_COMMAND
      • specify the command for update. default command is ncu.
        • for example, you may set to yarn or npm.
    • WITH_SHADOWS
      • if you specify this option, shows shadow dependencies changes.
      • default value is false.
    • KEEP
      • if you specify this option, keep working branch after all.
      • default value is false.
      • this is useful for debugging.
    • LOG_LEVEL
      • One of fatal, error, warn, info, debug, trace or silent.
      • default value is info.
      • if you want to know this tool’s internal states, set to debug.
    • WORKING_DIR
      • specify the working dir.
      • default value is ./.
    • SET_NODE_VERSION
      • specify the node version you want to run on.
      • default value is latest.

    Development

    Setup

    Run these commands in the project root dir.

    yarn install
    code .
    

    Release

    • release package to npmjs

      yarn publish

    • edit Dockerfile

    Visit original content creator repository https://github.com/taichi/actions-package-update
  • ionic-iap2

    In App Purchase 2 Starter Kit

    Starter Kit for one time purchases in your Ionic App

    This project is now unsupported – If you would like to take over from here, please dm me.

    The cordova ecosystem for in-app purchases is confusing to wade through and difficult to implement, but don’t fear, because I have you covered. In this plugin, I have implemented @ionic-native/inapppurchase2 and shown how to conifigure, track, and purchase something in app. Features include

    • Ionic 3.X Compatible
    • Apple & Google Integration Example
    • Blog Post Detailing Out The Implementation
    • Configure The IAP2 store
    • Configure Each Item
    • One Time Purchase
    • List Items For Sale
    • Purchase Items
    • Restore Purchases

    To Run

    • Configure Apple / Google Store
    • Create An Example Product To Purchase
    • Clone this repo
    • Change your apple / google store id in the config.xml file
    • Add your product id to the page you want to test
    • Run your app in a simulator or real device!

    Implementation Notes

    This app will only work on a simulator or real device. You will also need to configure the appropriate store and products in order to test purchases.

    If your interested in subscription purchases, create an issue or even submit a pull request yourself to add that functionality.

    Visit original content creator repository
    https://github.com/captaincole/ionic-iap2

  • aerospike

    About aerospike

    Aerospike là cơ sở dữ liệu NoQuery mã nguồn mở. Nó hỗ trợ mô hình lưu trữ key-value và document.

    Kiến trúc aerospike gồm 3 lớp:

    • Client layer

    Aerospike client là lớp client nguồn mở. Nó tự động theo dõi cluster liên tục xem nên biết được truy cập dữ liệu từ vị trí nào trong một cụm cluster, tự động detect các transaction lỗi, và query lại ở một máy khác chứa cùng dữ liệu.

    Download thư viện aerospike client tại https://www.aerospike.com/download/client/

    • Clustering and Data Distribution Layer

    Lớp này quản lý các giao tiếp cluster, tự động fail-over, replication, cross-datacenter replication (XDR), và cân bằng tải lại và di chuyển dữ liệu thông minh.

    • Data Storage Layer

    Lớp này chịu trách nhiệm lưu trữ dữ liệu trong DRAM và Flash cho phản hồi nhanh.

    Aerospike là một lưu trữ key-value với mô hình dữ liệu schemaless. Dữ liệu được đẩy vào trong các hộp chứa, namespace policy. Namespace chia dữ liệu thành các tập(set) tương tự như table trong RDBMS và các bản ghi(record) tương ứng với row trong RDBMS. Mỗi record được đánh một index key duy nhất trong tập set và một hoặc nhiều hơn các tên bins tương ứng với column trong RDBMS.

    Setup Aerospike

    Management

    Benchmark

    Visit original content creator repository
    https://github.com/keepwalking86/aerospike

  • crossword

    Crossword Generator

    An elegant online crossword puzzle generator that automatically arranges input words into crossword patterns.

    Features

    • 🎯 Automatic crossword layout generation
    • 🎲 Random word generation
    • 💫 Elegant animations
    • 🎮 Keyboard shortcuts support
    • 📱 Responsive design
    • 💎 Special highlighting for intersections
    • 🎯 Scrabble-style letter scoring

    Online Demo

    Live Demo

    Usage

    1. Enter English words separated by commas in the input box
    2. Click “Generate” button or press “G” key to generate crossword puzzles
    3. Use “Reset” button or “R” key to clear the current content
    4. Click “Random Words” or press “N” key to generate random word combinations

    Keyboard Shortcuts

    • G: Generate crossword puzzles
    • R: Reset
    • N: Generate random word combinations

    Core Algorithm

    The project uses the following algorithm to generate crossword puzzles:

    1. The first word is placed horizontally
    2. Traverse subsequent words, searching for possible intersections
    3. Check the validity of word placement
    4. Ensure all words have at least one intersection

    Letter Scoring System

    Uses a letter scoring system similar to Scrabble:

    • 1 point: A, E, I, L, N, O, R, S, T, U
    • 2 points: D, G
    • 3 points: B, C, M, P
    • 4 points: F, H, V, W, Y
    • 5 points: K
    • 8 points: J, X
    • 10 points: Q, Z

    License

    MIT License

    MIT License

    Visit original content creator repository
    https://github.com/aaamoon/crossword

  • facetcher-app

    Facetcher App

    Facetcher is a mobile app to turn your hand drawing sketch into a realistic face.

    Screens

    Image description Image description Image description

    Getting Started

    Facetcher is an app designed to generating images of human face based on hand drawing sketches. The app has a user-friendly interface that makes it easy for users to create facial sketches and generate images of suspects. To use the app, users first provide basic case details such as the title, gender, and description. They can then begin drawing the facial sketch using the app’s intuitive drawing tools. Once the sketch is complete, the app generates an image of the suspect based on the sketch. Users can edit the sketch until they are happy with the result. Once the user is satisfied with the generated image, they can submit the sketch along with case details and the generated image to the app. The app also provides a history screen that displays all the cases submitted by the user, allowing them to easily access past sketches and results. Users can export the generated image as a PDF file for convenient saving and sharing.

    How to Use

    Certainly! To run the Facetcher app, you will need to follow a few steps:

    • Download and install Android Studio on your computer.
    • Download or clone Facetcher app repository by using the link below:
    git clone https://github.com/henry-azer/facetcher-app
    
    • Open Android Studio and select “Open an existing Android Studio project” from the welcome screen.
    • Navigate to the directory where you cloned the Facetcher app repository and select the project folder.
    • Go to project root and execute the following command in console to get the required dependencies:
    flutter pub get
    
    • Once the project has finished loading, you can either connect your Android device to your computer using a USB cable or create an emulator in Android Studio.
    • If you’re using a physical device, make sure to enable USB debugging mode on your phone by going to “Developer options” in your phone’s settings and toggling the “USB debugging” option.
    • Select the device you want to run the app on by clicking on the device dropdown menu in Android Studio.
    • Finally, Run the app.
    flutter run
    

    By following these steps, you should be able to run the Facetcher app on your Android device or emulator without any issues. However, keep in mind that the exact process may vary depending on your specific setup and the version of Android Studio you are using.

    Project Structure

    ├──  android - This folder contains the main Android application code with the Gradle wrapper file.
    |    └── app/
    |    └── gradle/wrapper/
    │    
    │
    ├──  assets/fonts/ - This folder contains the fonts used in the app.
    │    
    │
    ├──  ios - This folder contains the Flutter engine code for the app on iOS.
    │    └── Flutter/
    |    └── Runner/
    │    
    │
    ├──  lang - This folder contains the languages used in the app.
    │    └── ar.json 
    │    └── en.json  
    |
    |
    ├──  lib - This folder contains the Dart source code for the app's user interface and business logic.
    │    └── config/
    |    └── core/
    |    └── data/
    |    └── features/
    |    └── app.dart
    |    └── bloc_observer.dart
    |    └── injection_container.dart
    |    └── main.dart
    │
    │
    ├──  test - The "test" folder in a Flutter project contains the test code for the app.
         └── widget_test.dart
    

    Features

    Here is a summary of the features Facetcher provides:

    • Login system: Users can create an account and log in to the app to access its features.
    • Home screen: The home screen displays the user’s name and provides access to the user profile, history, and options bar.
    • Sketch creation: Users can create facial sketches by providing the title of the case, the gender of the desired human, and a description of the case.
    • Result generation: The app generates a realistic based on the user’s sketch.
    • Editing: Users can edit and refine their sketches if they are not satisfied with the generated result.
    • Submission: Users can submit their sketches along with case details and generated images to the app.
    • History: The app provides a history screen that displays all the cases submitted by the user.
    • PDF export: Users can export the generated image as a PDF file for convenient saving and sharing.
    • Profile management: Users can manage their personal data, log out, and change their password.

    Libraries & Tools Used

    • get it
    • dio
    • Dependency Injection
    • Bloc (Cubit)
    • dartz
    • equatable
    • clean architecture
    • validation, logging
    • scrible drawer
    • localization
    • permission handler
    • pdf
    • path provider
    • shared perefences

    Contribution

    The development team for Facetcher app consisted of three developers: Henry , Mohamed, and Martina. Henry made the largest contribution to the project. He was instrumental in designing the app architecture, implementing complex features, and conducting extensive testing to ensure the app was stable and performant. Together, this team of developers worked tirelessly to create an app that was both functional and user-friendly, and that met the needs of our users. Their combined efforts resulted in a high-quality app that has been well-received by our users and has helped us achieve our business goals.

    Written by @Alber Ashraf

    Visit original content creator repository https://github.com/henry-azer/facetcher-app
  • USAboundaries

    USAboundaries

    CRAN_Status_Badge JOSS Status R-CMD-check Coverage Status

    Overview

    This R package includes contemporary state, county, and Congressional district boundaries, as well as zip code tabulation area centroids. It also includes historical boundaries from 1629 to 2000 for states and counties from the Newberry Library’s Atlas of Historical County Boundaries, as well as historical city population data from Erik Steiner’s “United States Historical City Populations, 1790-2010.” The package has some helper data, including a table of state names, abbreviations, and FIPS codes, and functions and data to get State Plane Coordinate System projections as EPSG codes or PROJ.4 strings.

    This package can serve a number of purposes. The spatial data can be joined to any other kind of data in order to make thematic maps. Unlike other R packages, this package also contains historical data for use in analyses of the recent or more distant past. See the “A sample analysis using USAboundaries” vignette for an example of how the package can be used for both historical and contemporary maps.

    Citation

    If you use this package in your research, we would appreciate a citation.

    citation("USAboundaries")
    #> 
    #> To cite the USAboundaries package in publications, please cite the
    #> paper in the Journal of Open Source Software:
    #> 
    #>   Lincoln A. Mullen and Jordan Bratt, "USAboundaries: Historical and
    #>   Contemporary Boundaries of the United States of America," Journal of
    #>   Open Source Software 3, no. 23 (2018): 314,
    #>   https://doi.org/10.21105/joss.00314.
    #> 
    #> A BibTeX entry for LaTeX users is
    #> 
    #>   @Article{,
    #>     title = {{USAboundaries}: Historical and Contemporary Boundaries
    #> of the United States of America},
    #>     author = {Lincoln A. Mullen and Jordan Bratt},
    #>     journal = {Journal of Open Source Software},
    #>     year = {2018},
    #>     volume = {3},
    #>     issue = {23},
    #>     pages = {314},
    #>     url = {https://doi.org/10.21105/joss.00314},
    #>     doi = {10.21105/joss.00314},
    #>   }

    Installation

    You can install this package from CRAN.

    install.packages("USAboundaries")
    

    Almost all of the data for this package is provided by the USAboundariesData package. That package will be automatically installed (with your permission) from the rOpenSci package repository the first time that you need it.

    Or you can install the development versions from GitHub using remotes.

    # install.packages("remotes")
    remotes::install_github("ropensci/USAboundaries")
    remotes::install_github("ropensci/USAboundariesData")
    

    Use

    This package provides a set of functions, one for each of the types of boundaries that are available. These functions have a consistent interface.

    Passing a date to us_states(), us_counties(), and us_cities() returns the historical boundaries for that date. If no date argument is passed, then contemporary boundaries are returned. The functions us_congressional() and us_zipcodes() only offer contemporary boundaries.

    For almost all functions, pass a character vector of state names or abbreviations to the states = argument to return only those states or territories.

    For certain functions, more or less detailed boundary information is available by passing an argument to the resolution = argument.

    See the examples below to see how the interface works, and see the documentation for each function for more details.

    library(USAboundaries) 
    library(sf) # for plotting and projection methods
    #> Linking to GEOS 3.9.1, GDAL 3.3.2, PROJ 8.1.1
    
    states_1840 <- us_states("1840-03-12")
    plot(st_geometry(states_1840))
    title("U.S. state boundaries on March 3, 1840")

    states_contemporary <- us_states()
    plot(st_geometry(states_contemporary))
    title("Contemporary U.S. state boundaries")

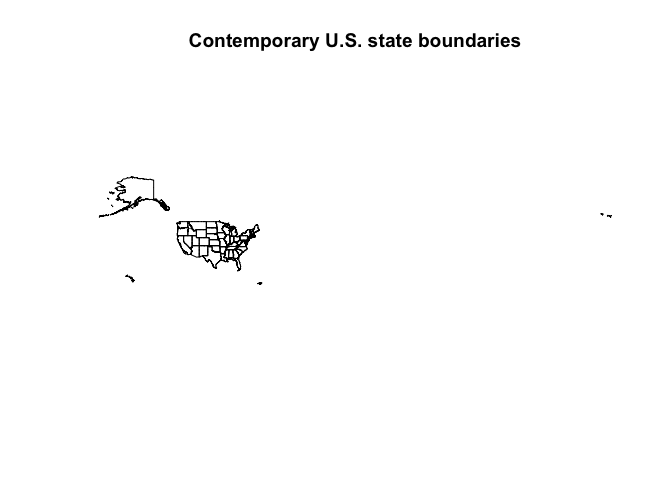
    counties_va_1787 <- us_counties("1787-09-17", states = "Virginia")
    plot(st_geometry(counties_va_1787))
    title("County boundaries in Virginia in 1787")

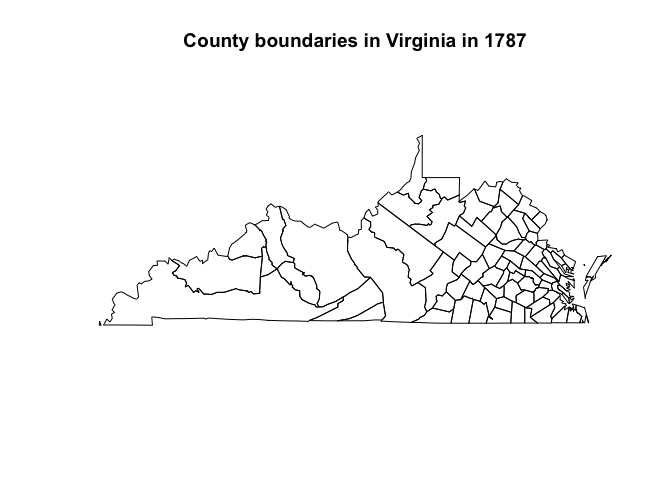
    counties_va <- us_counties(states = "Virginia")
    plot(st_geometry(counties_va))
    title("Contemporary county boundaries in Virginia")

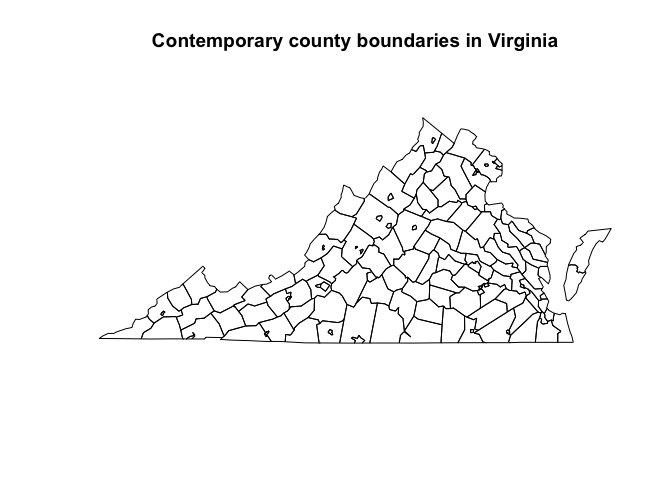
    counties_va_highres <- us_counties(states = "Virginia", resolution = "high")
    plot(st_geometry(counties_va_highres))
    title("Higher resolution contemporary county boundaries in Virginia")

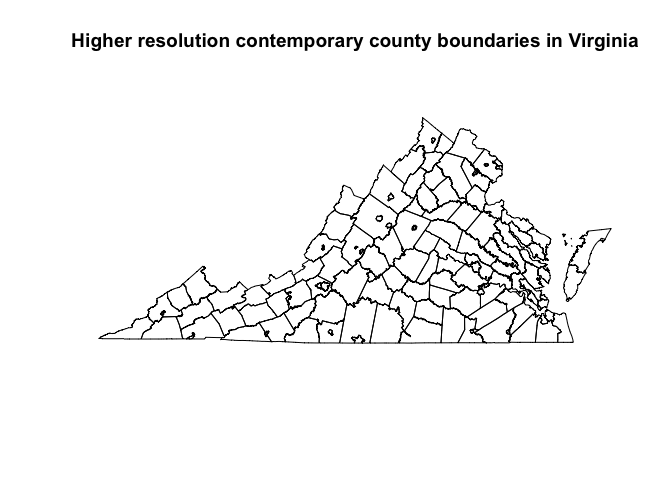
    congress <- us_congressional(states = "California")
    plot(st_geometry(congress))
    title("Congressional district boundaries in California")

    State plane projections

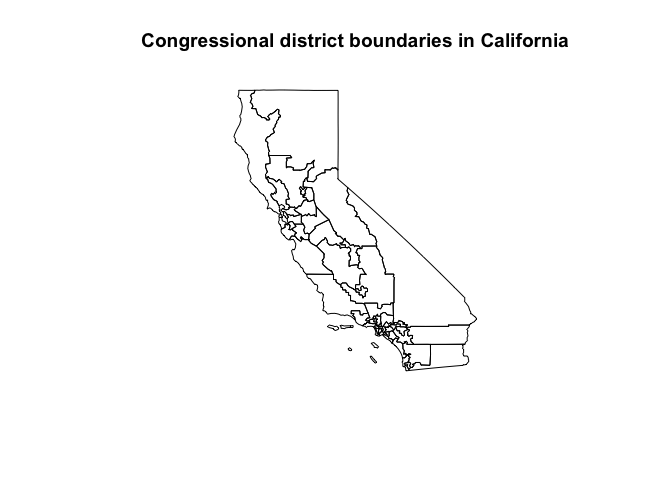
    The state_plane() function returns EPSG codes and PROJ.4 strings for the State Plane Coordinate System. You can use these to use suitable projections for specific states.

    va <- us_states(states = "VA", resolution = "high")
    plot(st_geometry(va), graticule = TRUE)

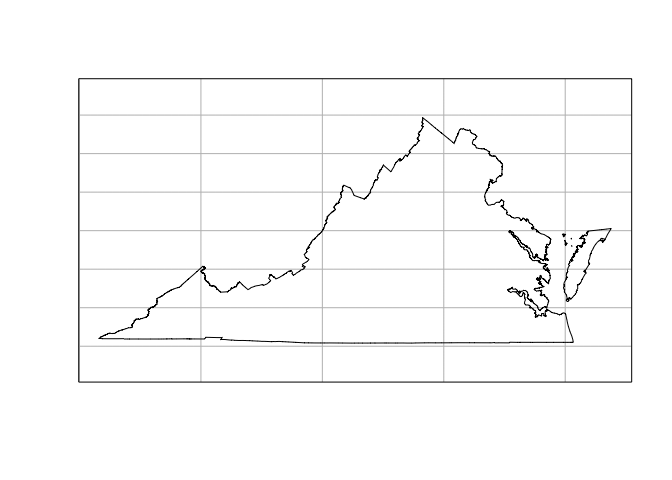
    va_projection <- state_plane("VA")
    va <- st_transform(va, va_projection)
    plot(st_geometry(va), graticule = TRUE)

    Related packages

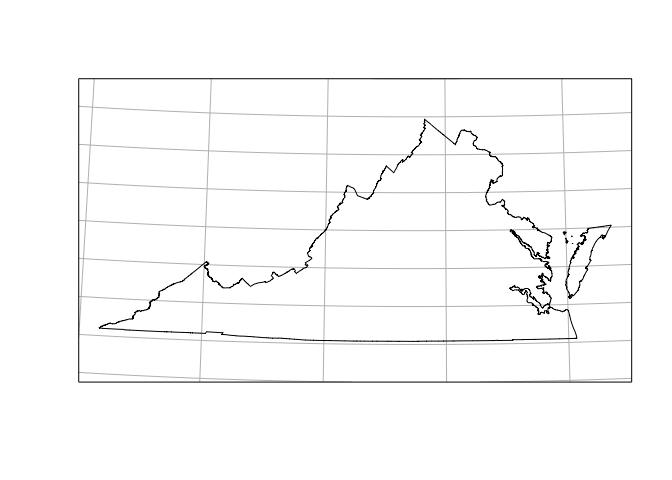
    Each function returns an sf object from the sf package, which can be mapped using the leaflet or ggplot2 packages.

    If you need U.S. Census Bureau boundary files which are not provided by this package, consider using the tigris package, which downloads those shapefiles.

    License

    The historical boundary data provided in this package is available under the CC BY-NC-SA 2.5 license from John H. Long, et al., Atlas of Historical County Boundaries, Dr. William M. Scholl Center for American History and Culture, The Newberry Library, Chicago (2010). Please cite that project if you use this package in your research and abide by the terms of their license if you use the historical information.

    The historical population data for cities is provided by U.S. Census Bureau and Erik Steiner, Spatial History Project, Center for Spatial and Textual Analysis, Stanford University. See the data in this repository.

    The contemporary data is provided by the U.S. Census Bureau and is in the public domain.

    All code in this package is copyright Lincoln Mullen and is released under the MIT license.
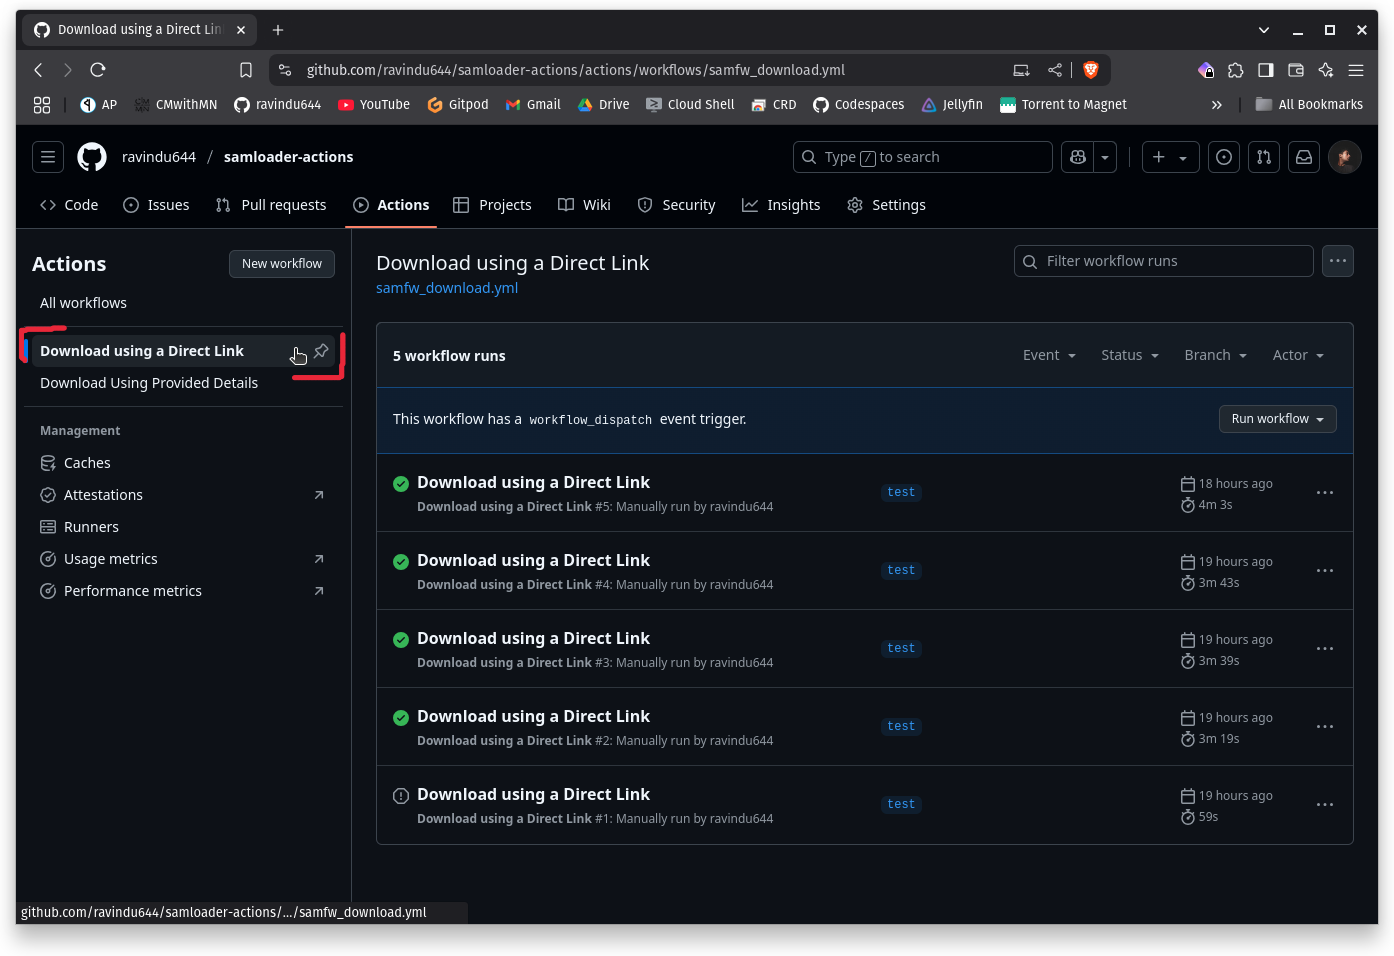
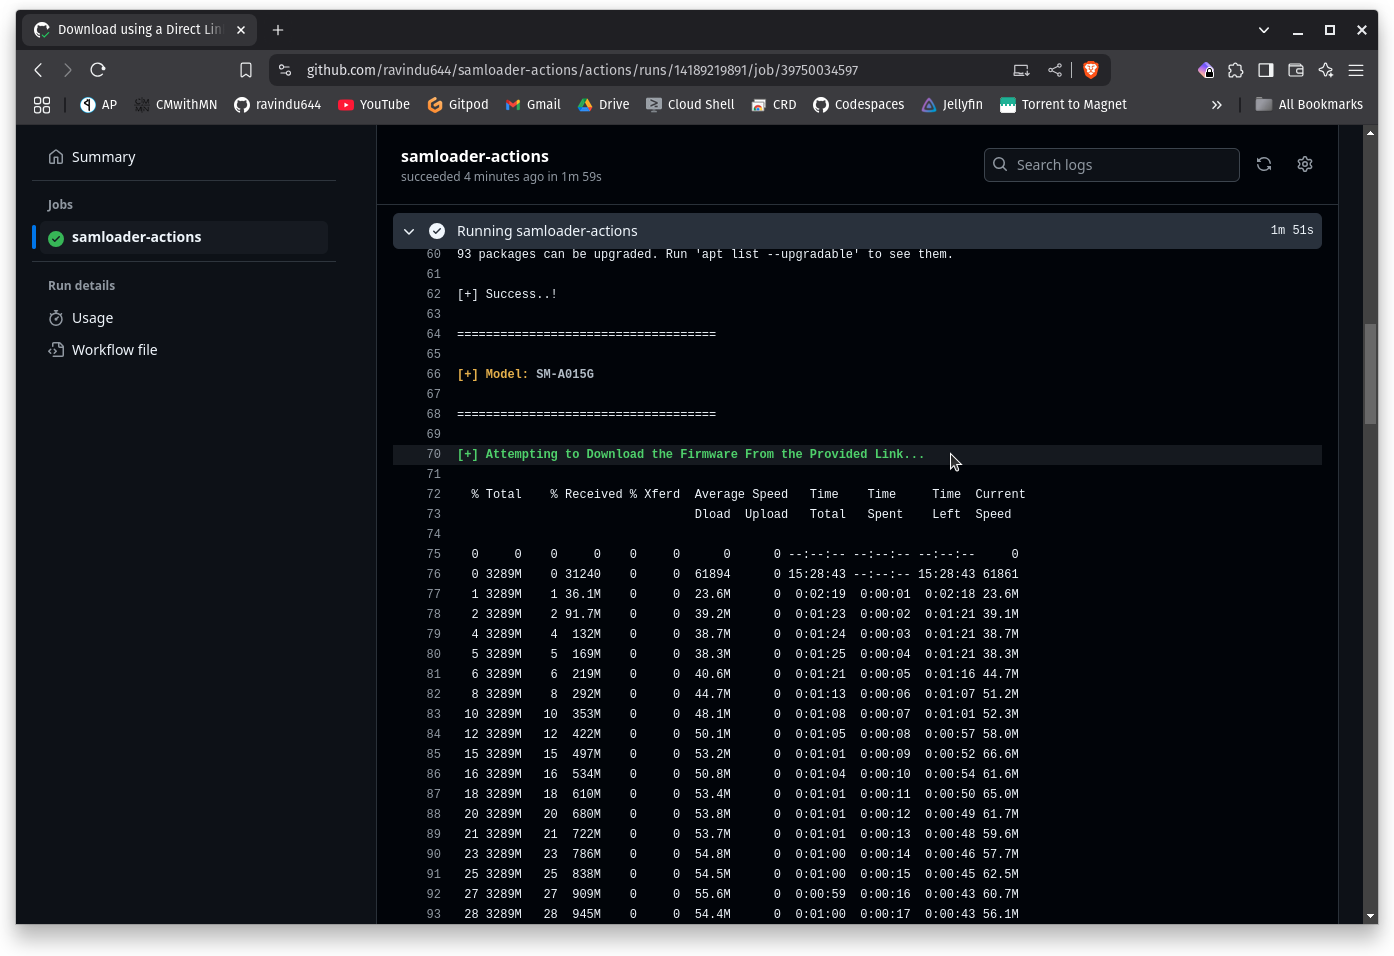
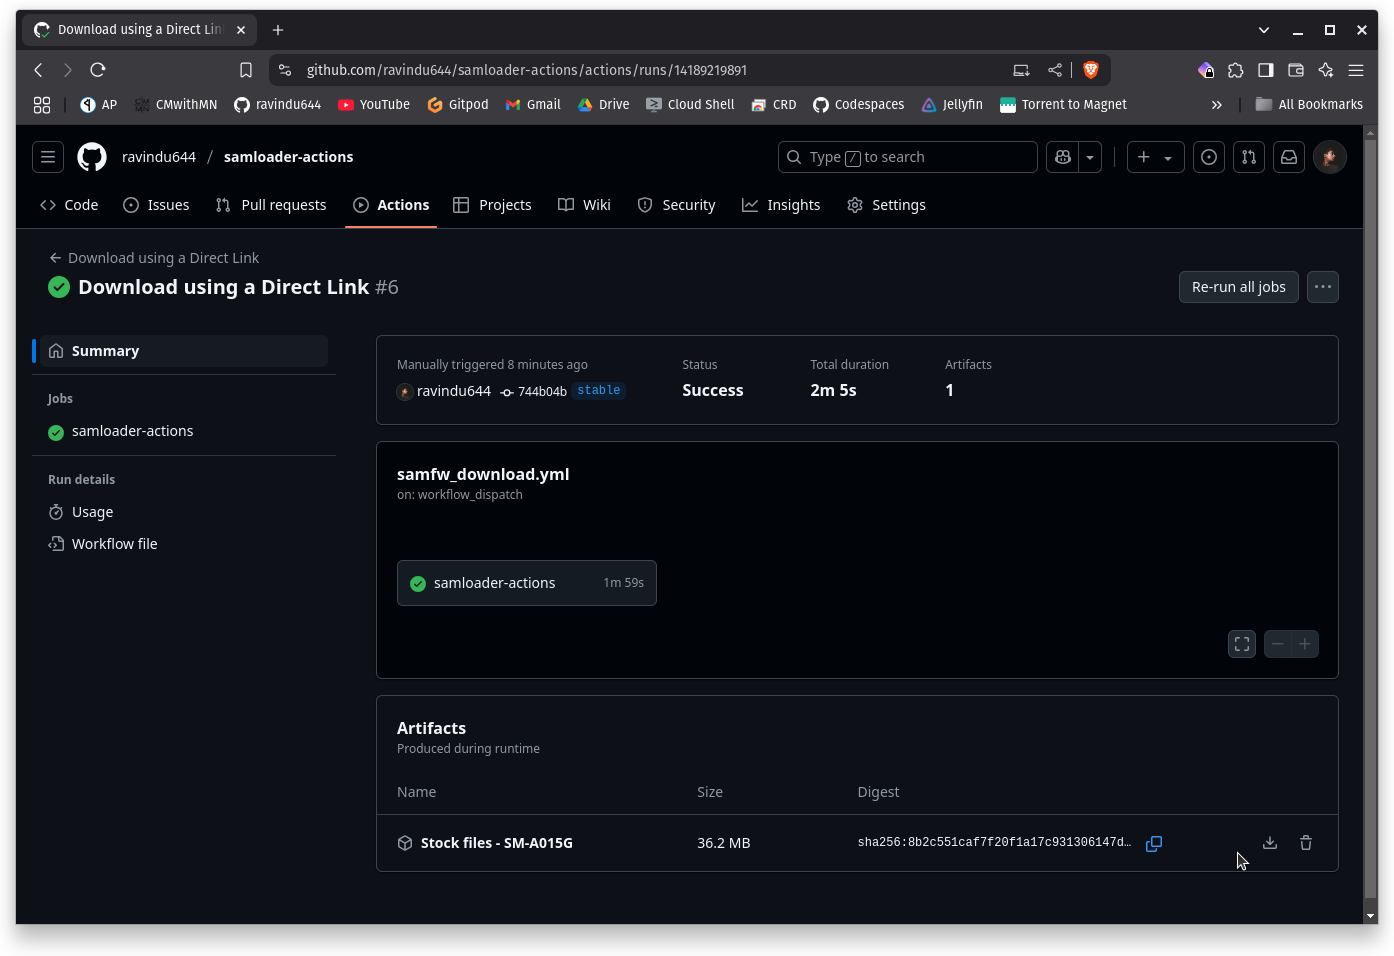
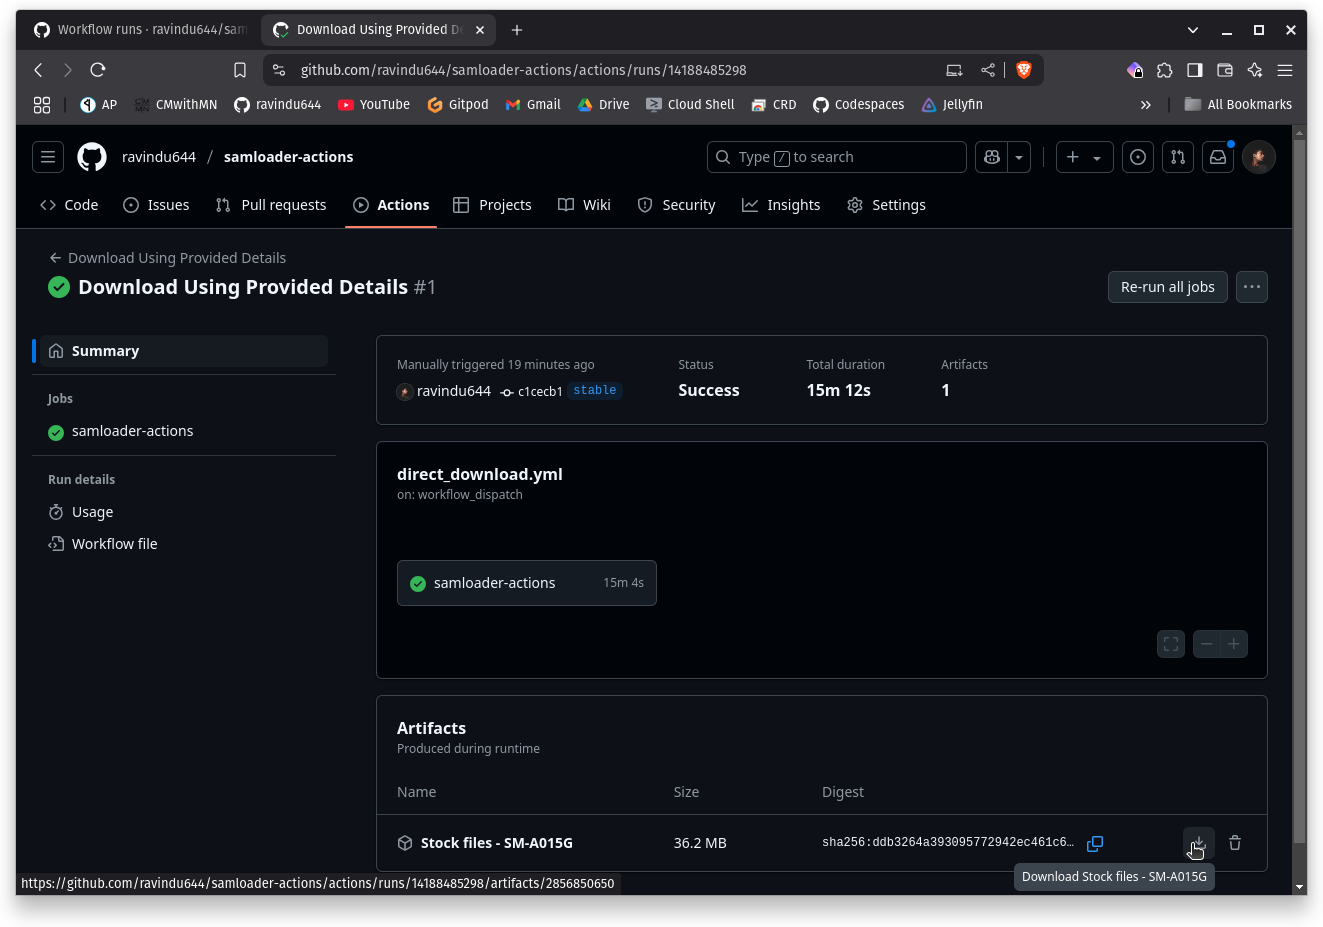
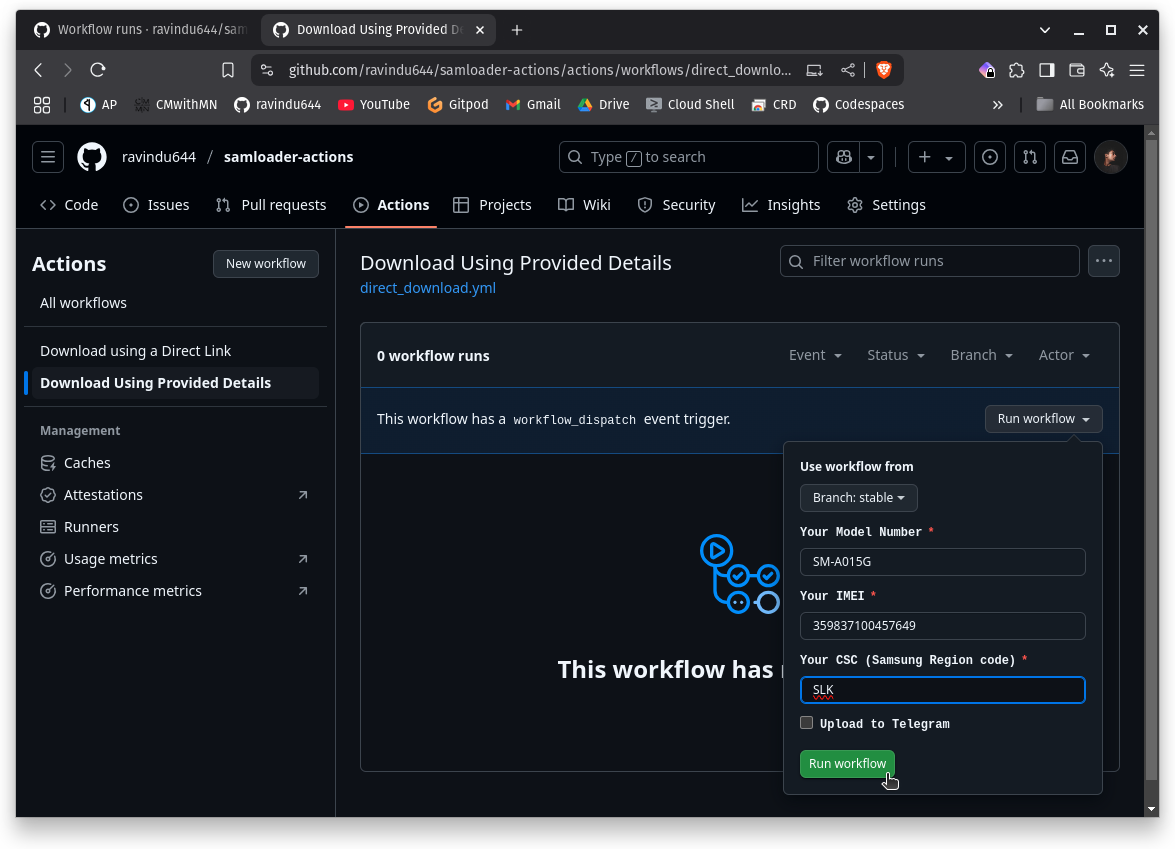
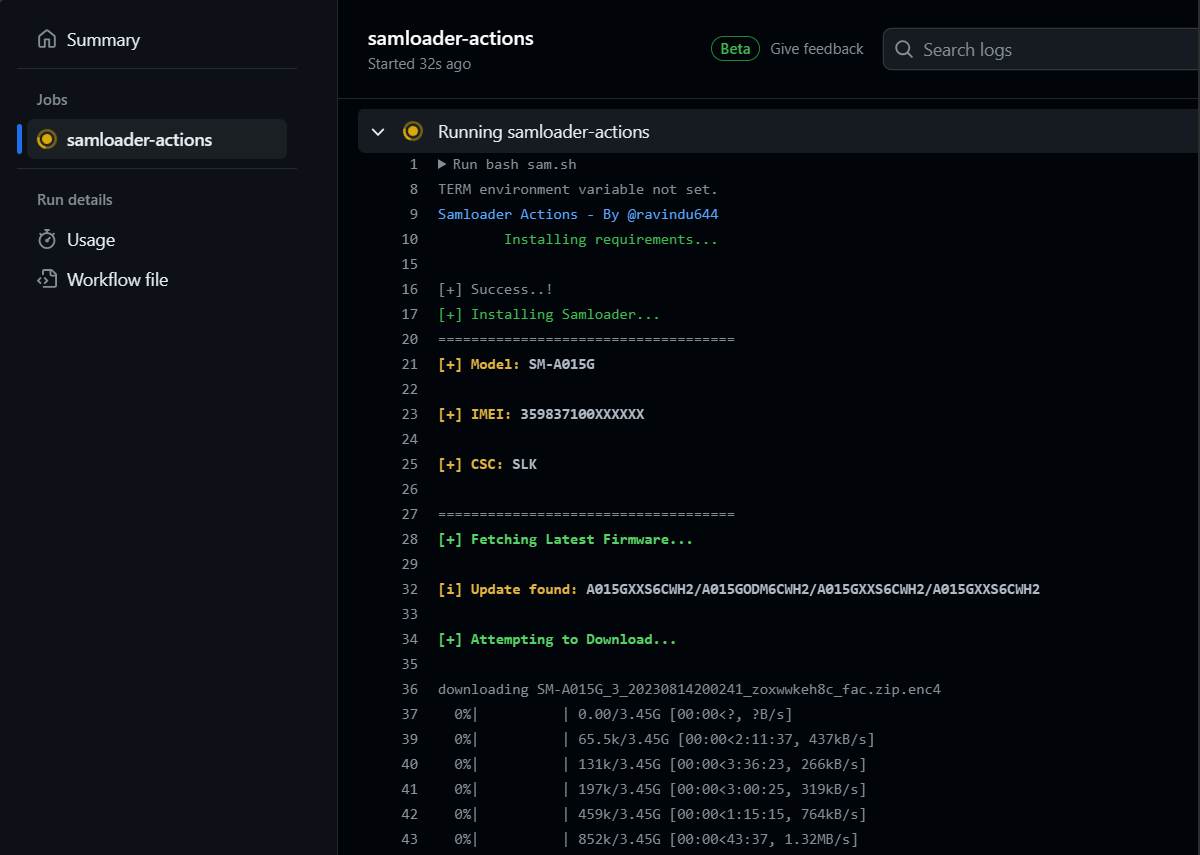

    rOpenSci footer

    Visit original content creator repository https://github.com/ropensci/USAboundaries
  • FloatProcessor

    FloatProc

    Python library to process biogeochemical float profiles

    Profiles received from biogeochemical (BGC) float can be processed in real-time and delayed mode with this library. Calibrations are applied to convert engineering counts to scientific units followed by the state-of-the-art corrections (more details). A web interface can be enabled to visualize the time series and profiles from the floats. The library converts the float msg to plane-jane MSG (PGM) compatible with Argo DAC.

    Installation

    Packages required and tested version:

    • numpy v1.11.2 and 1.12.0
    • scipy v0.18.2 and 0.18.1
    • statsmodels v0.6.1 and 0.8.0
    • simplejson 3.10.0 (original json package does not support NaN)
    • gsw v3.0.3 (compute seawater density)
    • pyinotify v0.9.6 [optional, to run real-time monitoring files]
    • geojson v1.3.5

    Setup the configuration file for the processing app:
    coming soon

    Setup the web interface (optional):
    coming soon

    Setup real-time run:
    coming soon

    First run

    Batch processing

    $python3 -O __main__.py bash cfg/app_cfg.json <usr_id>
    
    FloatProcess v0.1.0
    

    Real-time processing with daemon:

    $python3 -O daemon.py cfg/app_cfg.json
    
    FloatProcess v0.1.0
    Starting daemon for real-time processing
    <path...>/FloatProcess/cfg/app_cfg.json
    

    Processing one profile (real-time started from other application/script)

    $python3 -O __main__.py rt cfg/app_cfg.json <msg_file_name>
    

    Description of library

    Description of files from the packages:

    • toolbox.py: oceanographic toolbox containing the calibration and corrections methods
    • process.py: set of functions to load the configuration of the application and each individual float in order to process the profiles at different level
    • dashboard.py: set of functions to update the content of the web interface
    • daemon.py: start daemon for real-time processing monitoring a directory
    • test*.py: various files used for testing and development

    TODO

    • BUG FIX in O2 correction
    • ADD support GDAC processed and QC data
    • ADD support other float models: APEX
    • ADD Dark corrections to fluorescence chlorophyll a profiles
    • ADD drift correction to attenuation profiles
    • IMPROVE NPQ correction with current consensus
    • IMPROVE remove warnings from gsw when NaN values
    • REFACTORING process.py in one class
    • ADD Order float by active|more recent deployment in dashboard status
    • ADD dark correction for PAR sensor
    • UPDATE update_db to store all positions and dt_report in meta tables for each float

    Visit original content creator repository
    https://github.com/OceanOptics/FloatProcessor